Rik Boerma - Level / Game Designer

TOWER OF DOOM
ROLE
Level Designer
GENRE
First Person Shooter

MADE WITH
Trenchbroom
Tower of Doom is a custom level for the original Quake. Explore the tower, activate the elevators and, of course, shoot your way through hordes of monsters to make it to the top!
Made in the Trenchbroom tool over the course of 7 weeks, this project was focused entirely on level design and entailed gathering references, sketching, whiteboxing, playtesting, iterating, lighting and texturing.
General Information
Tower of Doom was built on 4 design pillars:
-
A level for experienced Quake players: Quake has been around for a long time and this level would be released to an audience of long-time fans.
-
The target difficulty is medium to hard, to match with this target audience.
-
Elevators are a central mechanic that set this level apart.
-
Target play time: 7-20 minutes.
Combat Setups
I designed combat encounters specifically around the different enemy types in Quake, making for varied and memorable encounters that encourage the player to devise tactics and adapt. Below are two examples.
The great hall
This is the largest combat arena in the level, so I wanted to keep the player in this space for a while and adapt it during gameplay to surprise the player.
When the player first enters, they will have to descend the walkway from which they entered before the enemies spawn, forcing them to fight the knights in relatively close combat, while ogres launch grenades from above. The pillars and open space provide room for the player to maneuver and take cover.
After clearing the first wave of enemies, the floor opens up to reveal the flying scrags, adapting the play space by cutting it through the middle, hindering the player with an obstacle that these enemies are not affected by. This forces the player to rethink their tactics and changes their relation with the environment they have just grown familiar with.
For the final wave, the wall on the side of the room opens up, changing the combat space yet again and combining the different enemy types from the last two waves into one.
The ogres in the corridor
When the player enters this corridor, they are quickly ambushed by ogres launching grenades in a tight space, forcing the player to adapt quickly. The player is offered some choice here; if they feel confident in their aim, they can launch grenades back at the ogres. Alternatively, they can take the elevator up to fight the ogres on even ground, but in an even tighter space.
One-pager
One-pager
The one-pager on the right gives a brief introduction to the level. It contains a node-map that has been adapted from the timeline; as I ran into technical issues, I had to split the central elevator up into seperate elevators on each floor.
In the bottom right of the one-pager, there is a difficulty curve based on the difficulty of each room as indicated on the timeline. The difficulty ramps up pretty quickly to establish the tone of the level early on for the intended target audience of experienced Quake players.

Sketches
Sketches
To gain inspiration for a castle-like level, I looked for real life references that I focused especially on architectural designs that could provide interesting gameplay as well and made several paintovers lof some of these images to better illustrate my ideas.


Floorplans
I initally made several sketches of floorplans featuring one large, central elevator, before splitting the elevator up later on. Each floor serves as one of the steps in the four-step level design process, functioning either as the introduction, development, twist or conclusion by featuring the elevator mechanic in a different way.


Blockouts
General Information
Blockouts
After I had developed a good idea of the basic layout I wanted my level to have and what I wanted to do with each room, I started blocking it out in Trenchbroom.
The process for this was to first build the most important elements that each room was designed for, like the central elevator in the first room, and then built the rest of the geometry around it.

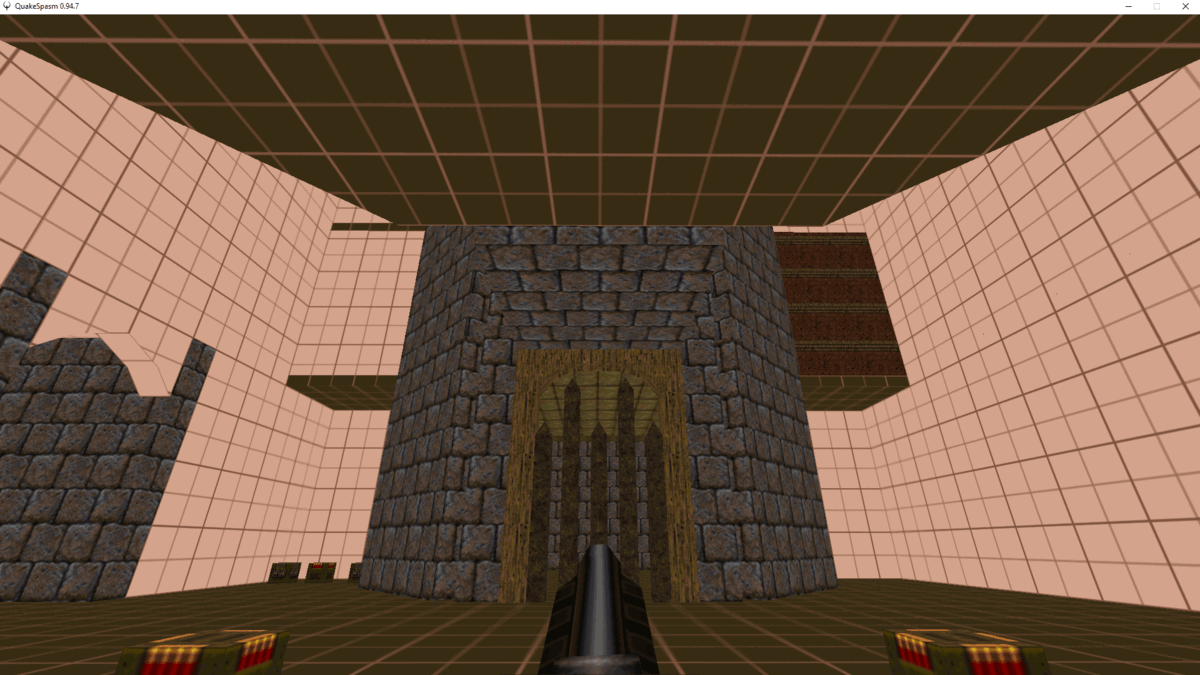
This was the original starting point of the level. The door with the elevator behind it is the first thing the player will see to immediately draw their attention to it. In the final version, the player starts in a little corridor below this room, so they have to climb some stairs, causing them to look up and see the verticality of the level.

One of the corridors on the first floor. The player has to walk through the lower segment, making them vulernable to the enemies on the walkways above, which is where one of this floor's switches is located.

The stairwell the player has to use to descend from F3 to F2. The player has the advantage of the high ground here but also has to face the challenge of fighting enemies on the staircase as well as the flying enemies in the room with little space to maneuver.
This was the original starting point of the level. The door with the elevator behind it is the first thing the player will see to immediately draw their attention to it. In the final version, the player starts in a little corridor below this room, so they have to climb some stairs, causing them to look up and see the verticality of the level.
Modular Kit
After verifying the quality of the blockouts through playtesting, I developed a modular kit of architectural elements that I wanted to use like arches, windows and domes, so I could easily reuse these elements to quickly setdress the level.

Starting Room Iteration
To encourage the player to look up and take in the verticality of the level, I pulled the player start back and had the player climb some stairs. The ammo boxes on the left side of the elevator (from the player's perspective) were also put on a slightly lower level for the same purpose (the player will turn around and walk back up the stairs to look up).
I used sight lines to encourage this further, by adding pointed arches above the room entrance and the elevator gate.
Finally, I textured and did a lighting pass on the room to establish a mood fit for Quake.
Above: The evolution of the pillar hall on F1. The floor opens up to reveal the second wave of enemies but I intentionally use the same texture for the whole floor to surprise the player. The middle set of pillars was removed to give the player a better view of the big door that opens up on the right side of the room to reveal the final wave of enemies in this space. The wall openings on the left give the player a look at the next elevator shaft they will reach, stimulating curiousity and giving a sense of their next goal.
Takeaways
-
Research: As Quake is a classic game, it was important to play and research it thoroughly to understand what its levels are like, as well as looking at real life references for inspiration.
-
Sketches & other visualizations: Doing paintovers of reference images, sketching out floorplans and rooms layouts, developing node maps and timelines to illustrate the level layout and flow.
-
Blockouts: Creating early versions of the level using basic shapes and textures for fast concepting and iteration.
-
Brushwork & modular tools: Creating reusable modular elements to dress up the level.
-
Setdressing: Using the modular elements I developed with textures and lighting to establish the right mood for the level.
-
Level Design principles: Using established principles and techniques for effective level design, such as creating memorable moments and using lighting and landmarks to leash players in the right direction.
-
Playtesting: Gathering feedback throughout the entire process, from the earliest blockouts to the final version to continually validate and improve the level design.
-
Trenchbroom: Working with and around this program's tools and limitations to build my level and realize the core concept as closely as possible.